Installing NeXtMidas on a Mac (OS X Mavericks)
Applicability: The following is a step by step guide for installing NeXtMidas on a Mac with an OS X Mavericks distribution. The installation is for a single user. The steps will be similar for other distributions of OS X. The installation on a Mac is not that different from a standard Unix installation. You may want to refer to the installation instructions included with the NeXtMidas download in file readmeinstall.html.
NextMidas History: X-Midas is a powerful signal processing tool that was originally implemented in Fortran. X-Midas is supported and maintained by MRSL (www.mrsl.com). NeXtMidas is an network version of the X-Midas tool that is implemented in Java. NeXtMidas was started in 1998 by Jeff Schoen, founder of Innovative Computer Engineering (ICE). NextMidas is not an ICE product but is supported and maintained by Technology Management Associates (www.techma.com). This installation guide of the open source NeXtMidas tool is provided by LucraLogic to assist the NeXtMidas user community.
Required Environment: The NeXtMidas installation instructions assume that the JDK version 1.6.0 or later is installed. NeXtMidas runs as a shell from the terminal window. The installation has been thoroughly tested with the X terminal, however, the terminal that ships with OS X can also be used. The X terminal provides support for a wider range of software products and that is why it is preferred by the author. Mavericks OS X shipped with an installation app for the X terminal called XQuartz. To install, just navigate to the X terminal app and follow the instructions. NeXtMidas runs in the C shell and since the default shell that ships with OS X is the borne again (bash) shell you will have to switch to the C shell as shown in the instructions. OS X ships with /Users/user as the users home directory and the following directions assume the standard user home directory. You can check your home directory by simply typing the following:
/bin/bash
bash-3.2$
To complete the installation you must be a user with Admin rights. If you just followed the standard startup when you got your Mac your user account should have Admin rights.
The Java installation as shipped on the Mac is different from the standard installation. The jar file tools.jar is needed for the NeXtMidas installation. Fortunately, the classes.jar file found in the Mac Java installation contains the classes in tools.jar. By creating a link to classes.jar from tools.jar the needed classes will be available when NeXtMidas is compiled. Enter the following to create the link:
/System/Library/Java/JavaVirtualMachines/1.6.0.jdk/Contents/Home/lib/tools.jar
ln -s /System/Library/Java/JavaVirtualMachines/1.6.0.jdk/Contents/Classes
/System/Library/Java/JavaVirtualMachines/1.6.0.jdk/Contents/Home/lib
Installation Process
Basic steps for installation are to create the directory structure, download and expand NeXtMidas, set up permissions, set up the environment, and build NeXtMidas.
Directory Structure: Create the directory for each user under /midas/data1. Since we are setting this up for just one user we need to create just one separate directory /midas/data1/user. You should substitute the actual user name for the subdirectory user. In the following example the name of the user is Greg. To find what the users names are just type users in the terminal as shown below:
Greg
bash-3.2$
Then create the directory structure for the user "Greg" with the mkdir command as shown below:
Password:
bash-3.2$
Next create a directory for NeXtMidas. The instructions with the NeXtMidas download also instruct you to create a directory /midas/icedisk. The icedisk is only for the ice hardware support. Since you will not be using the ice hardware with your Mac you do not need to create the directory.
Download & Expand NeXtMidas: Simply use the browser to navigate to http://nextmidas.techma.com and download the latest version (nxm350 at the time that this guide was created). Move and expand the file you have downloaded to the directory /opt/midas/. You can simply use Finder on the Mac to move the file from Downloads to /opt/midas/ and then just expand using the following command:
bash-3.2$
Setting Permissions: The next step is to set the group, owners, and the permissions. The first step is to create the group midas and user. Select the Launchpad and navigate to System Preferences. In System Preferences find and select Users & Groups. Select the lock at the bottom left corner of the window and enter the password and select unlock. Next select the plus sign that is located just above the lock symbol. When a new window opens navigate to the New Account drop down and select Group. Enter the group name midas into the window and select Create Group. A window should now appear with the group testing at the top and check boxes for membership. Select the users check box to assign the user to the midas group. Now repeat the process to create the group user and assign the user to the user group. In this example the user is Greg. Select the lock again to lock the settings. Now all that is needed is to assign the directories to the group midas and set the permissions in the terminal as shown below:
bash.3.2$ sudo chgrp -R midas midas
bash-3.2$ sudo chmod -R 775 midas
bash-3.2$
A similar change to group and permissions is required to allow NeXtMidas to compile. The group membership for all the files in the /opt/midas directory must be changed. Change the directory and modify the group and permissions as follows:
bash.3.2$ sudo chgrp -R midas midas
bash-3.2$ sudo chmod -R 775 midas
bash-3.2$
Environment: The environment variables will need to be entered every time that the C-shell is started so the environment variables should be placed in the user profile Users/user/.cshrc. The environment variables for JAVAHOME and NMROOT have to be set up. The JAVAHOME should be set to the location of the JRE while the NMROOT is set to the default path and the downloaded version of NeXtMidas. Aliases should be created to automate the opening of frequently used files. In the example shown below, the nmstart and nmhelp aliases have been created to automate the execution of nmstart and the opening of the help file index.html. Finally, additional memory should be allocated to the Java heap memory. In the example, the Java heap memory is increased to 1024 Mega Bytes or 1 Giga Byte. To create the .cshrc file, simply navigate to the Users/user/ directory and create the file .cshrc using vi or your favorite editor. Note that the .cshrc file will be hidden, but can be listed with the command the following command:
Create the .cshrc file with the following entries:
setenv JAVAHOME /System/Library/Java/JavaVirtualMachines/1.6.0.jdk/Contents/Home
setenv NMROOT /opt/midas/nxm350
setenv NM_USER_JVM_FLAGS "-Xms1024m -Xmx1024m"
alias nmstart 'source $NMROOT/os/unix/nmstart'
alias nmhelp 'open /opt/midas/nxm350/htdocs/index.html'
A quick way to create the .cshrc file is to open a new .cshrc file with the vi editor and then copy and paste the text from this guide directly into the file. The .cshrc file must be placed in the Users/user/ directory.
The Mac is shipped with the Bourne-again shell. NeXtMidas requires the C-shell so before starting NeXtMidas the C-shell must be entered.
csh(Greg):
Note that the prompt has now changed to the default for the C-shell as defined in the .cshrc file you created.
Building NeXtMidas: Now enter the following command to start NeXtMidas:
The copyright and a message that NeXtMidas must be compiled will be displayed. Next, enter the following to compile:
This command should complete after a few minutes and display that no error were encountered. You should also create the user contributed library by entering the following:
If everything is correct you can proceed with testing and running NeXtMidas. NeXtMidas runs from a shell that is started by typing "nm". Type "exit" to leave and close the shell followed by nmend to remove all NeXtMidas variables.
Testing & Running NeXtMidas
You should now test NeXtMidas with the following that will test all of the NextMidas commands. Ideally there should be no errors but don't be concerned if there is one error since some of the commands require network connections.
nM> confidence
For my Mac, the confidence test produced one failure. The next test is to test the ability of NeXtMidas to display graphics. Enter the following to display an image of a penny:
A new window will be opened and an image of a penny will be displayed. For some reason, the first time this is run you must select the java icon in the application tray to display the penny image window. After you get bored of looking at the image of the penny you can close the window by selecting the x in the upper left corner. To learn more about the features of NeXtMidas and try other commands type nmhelp at the command prompt and a hypertext help document will be displayed. When you are done working in the NeXtMidas shell, simply exit by typing exit followed by nmend. The NeXtMidas program can be used as a command as shown in the following example to display the penny image.
csh(Greg):
The penny image will display as before by the shell will not be entered. The installation is now complete and you should be able to utilze all feature of the NeXtMidas framework. If in using this guide you find any differences or errors please report them on the NeXtMidas blog on the LucraLogic web site. The author will revise the guide based on your comments to improve the installation process for others. If this guide is too technical, the author is working on an automated installation and it will be posted on the LucraLogic website when complete.
First Time Users: If you are new to NeXtMidas you are now wondering where do I go from here. My advice is to go through the excellent tutorial that comes with NeXtMidas. All you need to do is open your terminal and at the prompt change to the C shell, start next midas with the nmstart followed by nm commands and then open the help guide with nmhelp. The commands will look like this:
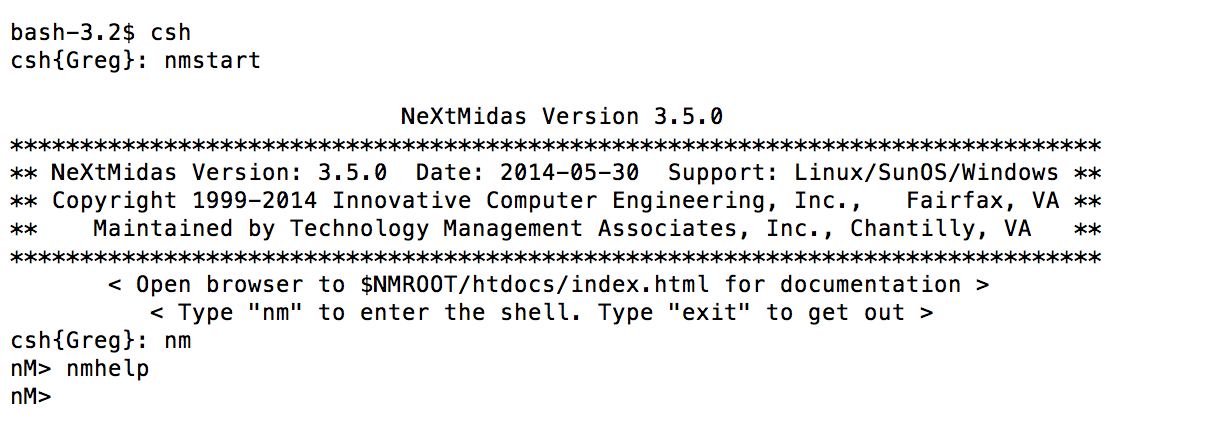
After you type nmhelp, the browser window will open and you should navigate down to, and select NeXtMidas Training. Then just follow the tutorial.
Alternate Installation Methods: If you don't like using the Users & Groups application and wish to use the command line the following commands will modify the groups: